
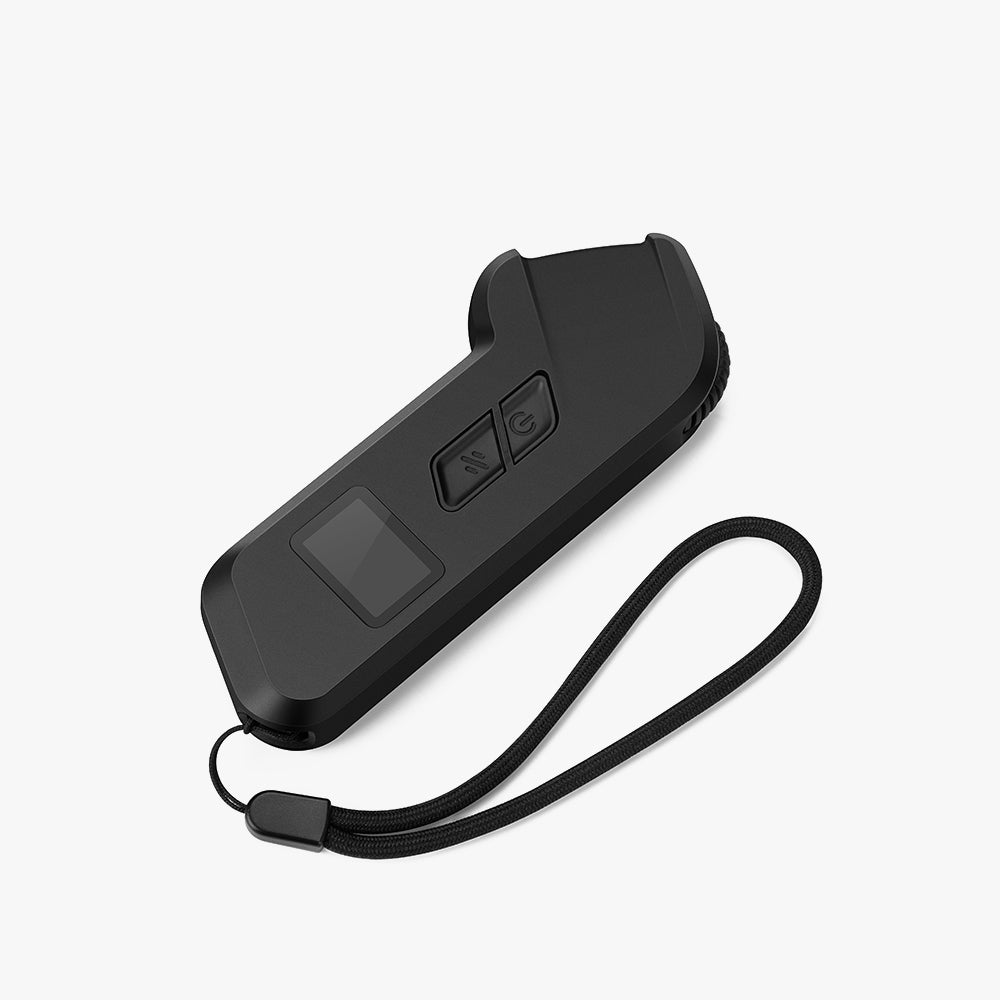
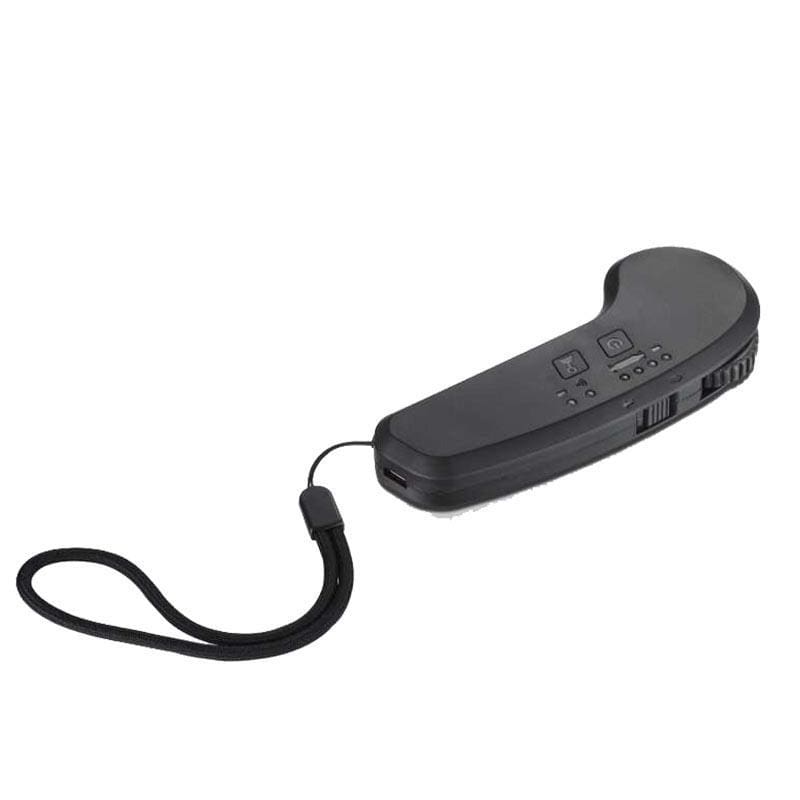
REMOTE CONTROL
Applicable Board Mode
- 3 Speed Mode Remote: MAX ONE / MAX2 PRO / M5 KIT
- 4 Speed Mode Remote: CYBER MINI / MAX2 PRO / MAX5S / MAX6 / FF PRO / FF BELT / FF AT / M5 KIT
Shipping & Stock
Note: Maxfind has stock in local warehouses for quick shipping!
- United States: 15-20 Days (By China)
- European Union: 15-20 Days (By China)
- Canada: 15-20 Days (By China)
- Australia: 15-20 Days (By China)
- United Kingdom: 15-20 Days (By China)
Buy Now, Pay Later
- Sezzle Pay: Available in the U.S. & Canada
- Klarna Pay: Available in Europe
Note: Installment options are not available in other countries and regions. Please use Credit/Debit Card or Paypal to pay.
3 Months Warranty
We will provide 3 months warranty service, please refer to our warranty policy for details.
https://www.maxfind.com/pages/warranty
PAIRING INSTRUCTIONS
If you have any questions, you are always welcome to contact us. We'll get back to you as soon as possible, within 12 hours on weekdays.
-
Customer Support
If you have any questions, you can consult through online chat or contact us by email, thank you.
E-mail: service@maxfind.com
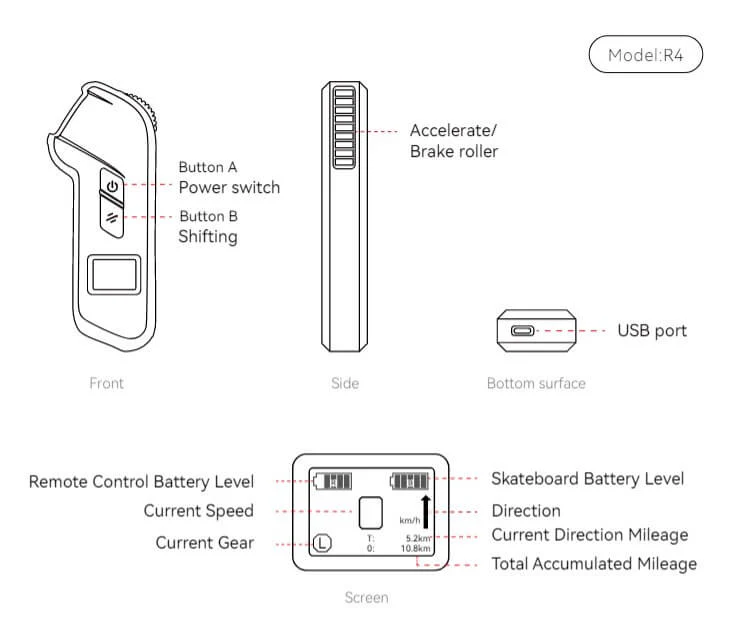
4 SPEED MODE REMOTE
Power on
When devices are off, press and hold the "Power button" of the remote control for 1 second to turn it on, the remote control will vibrate once before entering pairing mode, then press the power button of the Skateboard for 0.2 seconds to turn it on and enter pairing mode.
Power off
When devices are on, press and hold the "Power button" of the remote control for 2 second to turn it off, the remote control will have one short vibrate. Press the power button of the Skateboard for 1 seconds to turn it off.
Auto shut down: When the skateboard is at quiescent state and there is no operation for 5 minutes, the remote-control and the skateboard will be automatically shut down.
Control of accelerator/brake
Roll the roller forwards to accelerate, Roll the roller backwards to brake.
Auto shut down: When the skateboard is at quiescent state and there is no operation for 5 minutes, the remote-control and the skateboard will be automatically shut down.
Direction switch of the skateboard
Continuously press the function key twice to switch the forward direction, and the remote control vibrates once.
Note:This operation is only effective when the roller is in the middle position (zero throttle) and the speed is less than 3km / h.
Ambient Light Control
Double-click the remote control power button to activate the ambient lights; double-click again to deactivate the ambient lights.
Gear switch
Press the function key once to switch gears, and the remote control vibrates once.
Note:This operation is only valid when the roller is at the central position (zero accelerating).
Steps to re-pair the remote with the eboard:
1. Both the remote and the eboard are powered off.
2. Eboard: Press and hold the power button for 5 seconds, prompting to enter the pairing state with the blue light flashing quickly.
3. Remote: Press and hold the A power button for 5 seconds. After the screen enters the BOARD TYPE page option, use the " Roller " and the A power button to select and confirm (10S OR 12S).
4. Remote control: Enter the setting steps of relevant parameters, select and confirm by turn-ing the " Roller " and the A power button, and finally the pairing is successful when the screen displays the skateboard information.
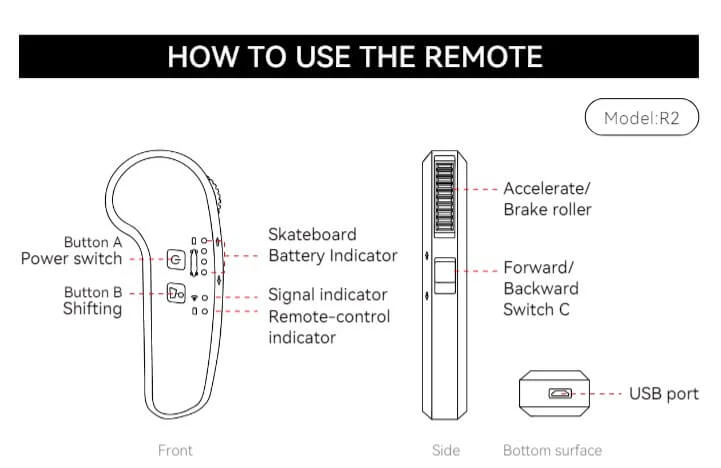
3 SPEED MODE REMOTE
Power on
In the off state, long press “Button A” on the remote-control for 1 second to turn it on. The remote-control will vibrate once and enter Connection Mode, and the signal indicator flashes red slowly(1 second/flash). Then short press (for 0.2 second) the power switch of the skate-board once to enter the Connection Mode, and the indicator flashes red slowly (1 second/-flash). Note: After connecting, the remote-control indicator and the skateboard indicator are always on.
Shutdown
Manual shutdown: In the on state, long press “Button A” for 2 seconds to shut it down and the remote-control will vibrate once. Long press the power switch for 1 second to shut the skateboard down.
Note: If the remote-control is left on after the skateboard is shut down, the remote-control indicator flashes red slowly, and the remote-control vibrates once as a reminder. Similarly, if the skateboard is left on after the remote-control is shut down, the skateboard power indica-tor flashes slowly.
Auto shut down: When the skateboard is at quiescent state and there is no operation for 5 minutes, the remote-control and the skateboard will be automatically shut down.
Connection and pairing (Already paired in factory)
When both the remote-control and the skateboard are all in the off state, first, long press the power switch of the skateboard for 5 seconds, the skateboard indicator flashes red quickly, prompting to enter the pairing state. And then long press the “Button A” on the remote-con-trol for 5 seconds, the signal indicator starts to flash quickly, indicating entering the pairing mode. The two short vibrations and a long vibration of the remote-control indicate the pairing succeeds. When the pairing succeeds, the remote-control signal indicator and the skateboard indicator shine red.
Battery indicator
Remote-control battery indicator: When the remote-control is turned on, if the detected remote-control battery is lower than 25%, the remotecontrol battery indicator shines red. If the battery is sufficient, the indicator shines green. When the remote-control indicator shines red, please charge it in time. When the voltage is lower than safe voltage, the power output will be shut down. Under such circumstance, please brake immediately.Remark: When the skateboard is connected after turning on, the battery indicator will show for 2 seconds. After 2 seconds, the indicator shuts down. Short press Button A at any time to show the battery of the skateboard and the remote-control again for 2 seconds, and then it turns off.
Control of accelerator/brake
Roll the roller forwards to accelerate, Roll the roller backwards to brake.
Direction switch of the skateboard
In the forward state, stir the “Switch C” backwards, the remote-control will short vibrate once, and the indicator will flash backwards to indicate “reverse mode” ; In the backward state, stir the “Switch C” forwards, the remote-control will short vibrate once, and the indicator will flash forwards to indicate “forward mode”. Note: This operation is only valid when the accelerator lever on the remote-control is at the central position (zero accelerating).
Gear switch
The physical Button B on the remote-control in the diagram is for gear switch of the skate-board.When switch to corresponding gear by short pressing, the battery indicator of skate-board will flash and move in low, medium and high speed.Note: This operation is only valid when the roller is at the central position (zero accelerating).
Charging
Charging of remote-control: When the remote-control is connected to the charger, it will vibrate once and its batteryindicator flashes red. The indicator will turn green when the battery is fullRemarks: Other actions cannot be operated on the remote-control in charging state. If unplug the charging cable, the remote-control will vibrate once and shut down automatically.
Electric skateboard charging connection
A. Open the rubber lid on the charging interface, insert the plug, the charger indicator will shine green.
B. Connect the charger cable with 100-240V AC, and the charger indicator will shine red during the charging process.
C. When charging is completed, close the lid firmly. When the battery is full, the charger indicator shines green.
REMOTE PAIRING PARAMETERS
New Remote Control Pairing Steps
Power-off State: Ensure that both the remote control and the skateboard are turned off.
Skateboard Pairing Mode: Press and hold the skateboard power button for 5 seconds until the blue light flashes rapidly.
Remote Control Pairing Mode: Press and hold the remote control power button for 5 seconds until the screen displays "BOARD TYPE" or "10S or 12S," indicating successful pairing. (Do not release the button when "MAXFIND" appears on the screen). Successful pairing will be confirmed by two short vibrations followed by a long one.
Select and set the parameters according to different models
Setting Parameters for a New Remote Control Pairing
Explanation of Motor Parameters
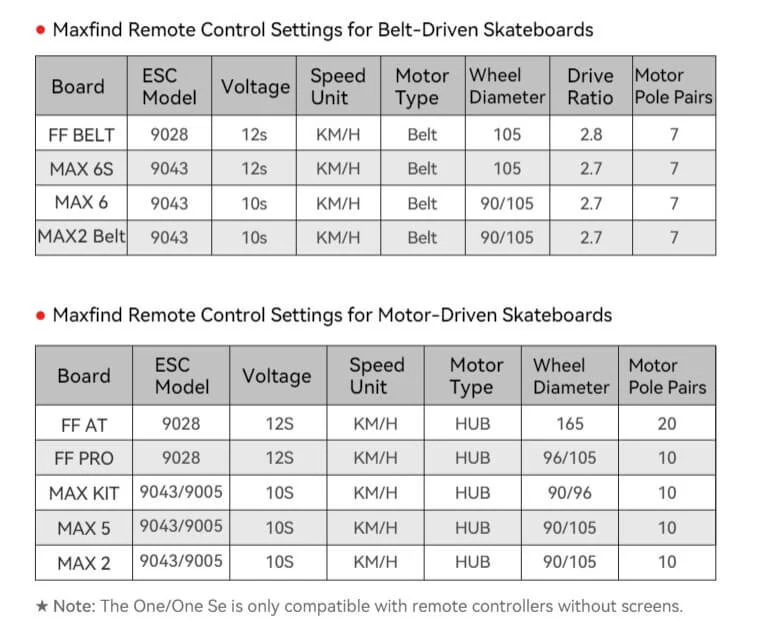
A. 9005 / 9043 /9028 : ESC type (Choose 9028 for the FF series, 9043 for the MAX series with belt motor, and 9005 for MAX series with hub motors).
B. 10S/12S: System voltage type.
C. Belt / Hub: Choose Belt for belt-driven motor skateboards, and Hub for hub motor skate-boards.
D. KM/H / Mph: Unit of speed.
E. Wheel Diameter: Refers to the diameter of the wheels.
F. Drive Ratio: Refers to the gear ratio. Number of teeth on the synchronous pulley/number of teeth on the motor wheel. If you change gears or synchronous pulley, which changes the gear ratio, you need to select the new gear ratio accordingly.
G. Motor Pole Pairs: Refers to the number of motor pole pairs. (The default for belt-driven motors is 7 pairs; the default for hub motors is 10 pairs; the off-road 165 motor is 20 pairs).
Setting Parameters for a New Remote Control Pairing
1. Complete the remote control pairing and keep the remote control and skateboard turned on. Setting Parameters for a New Remote Control Pairing
2. Turn off the skateboard and keep the remote control on---press the power button to turn on the skateboard---within 10 seconds of turning on, press the power button switch 5 times. ( This process needs to be repeated several times.)
3. With the motor making a noise, indicating it has started to spin, the system enters self-learning mode for about 30 seconds (Do Not Move The Remote Control During the Learning Process.)
4. Turn off both the remote control and skateboard, then turn them back on to use normally.
WARNING
- Do Not Over Charge The Remote, Or It Will Destroy The Remote Battery.
- The Remote Will Be In Standby Mode If The Electric Skateboard Is Off.(The Remote Will Be Connected Again When The Skateboard Is On).
- Please Turn Off The Remote When Non-Use, Or It Will Consume The Remote Battery And Shorten The Usage Life Of The Remote Battery.
- Remote Range Is About 10 Meters, And It Will Be Unconnected Over This Limitation.
- The Skateboard Would Stop Working Once Switching The Direction Mode, And It Won’t Be Changed Directions Until The Skateboard Stops.
- Please Put On The Official Sling On The Remote Or The Remote Would Be Lost On Your Riding.
CUSTOMER REVIEWS
Actual feedback from our MAXFIND community. Real people, real rides.